|
|
|
Step 3 - Remote Servers
|
Brief Overview
|
In this step, you will specify the remote servers that the Trellis NAS Bridge Appliance will bridge to.
There are two bridging methods that the Trellis File System uses to bridge to remote servers. The first is to connect to the remote server via SSH. In this case, authentication is handled by the SSH agents using the keys provided in Step 2. The second method is to use the SMB/CIFS protocol. We will explain how to set up bridging using these two methods separately.
|
|
Using SSH to Access Remote Servers
|
Below is the screen that is presented when you click on Remote Server under Step 3 (see a) in the screenshot below) in the left-hand menu.
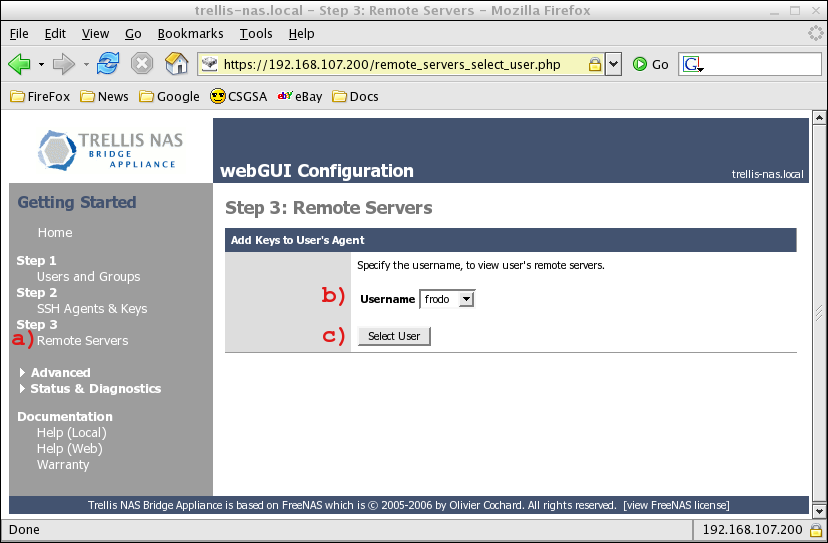
The first step in setting up a remote server is specifying the user account on the appliance that will connect to the remote server. This example will demonstrate how to use SSH protocols access to the remote servers. The user selected must correspond to a user that has an SSH agent running and loaded private key (from Step 2). Select a user from the drop-down menu (see b) in the screenshot above) and press the Select User button (see c) in the screenshot above).
The next screen will be:
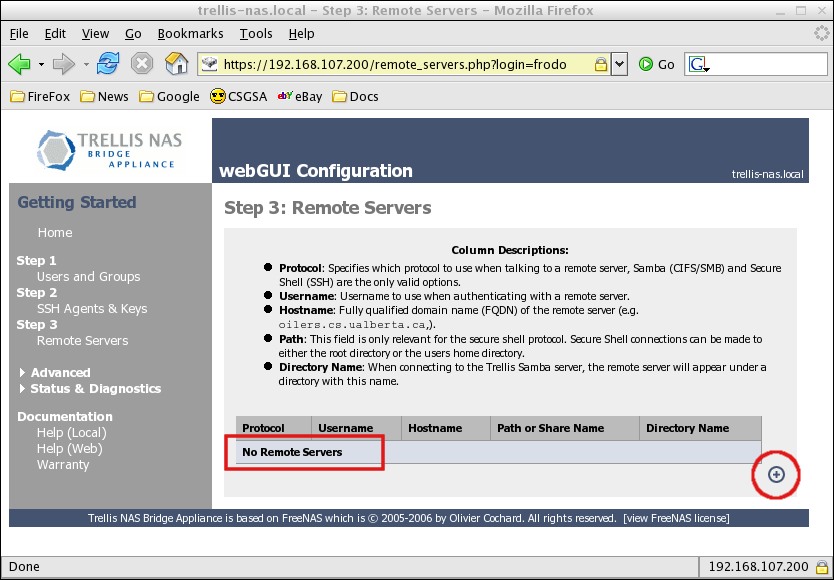
This screen shows that the user frodo has no remote servers specified. To add a remote server, click on the plus sign below the table of servers.
Clicking the plus sign will lead you to the page below. In this form, you specify the details of the remote server you will access via the appliance.
The drop down menu (see a) in the screenshot below) will let you select either SSH or SMB/CIFS protocol to access the remote server.
This example will demonstrate the SSH protocol. With SSH protocol you will specify three details:
- The hostname of the remote server (see b) in the screenshot below )
- Username to connect with to the remote server (see c) in the screenshot below)
- Whether to access the specified user's home directory or the root (/) directory (see d) in the screenshot below)
The hostname must be a fully qualified domain name (e.g. oilers.cs.ualberta.ca).
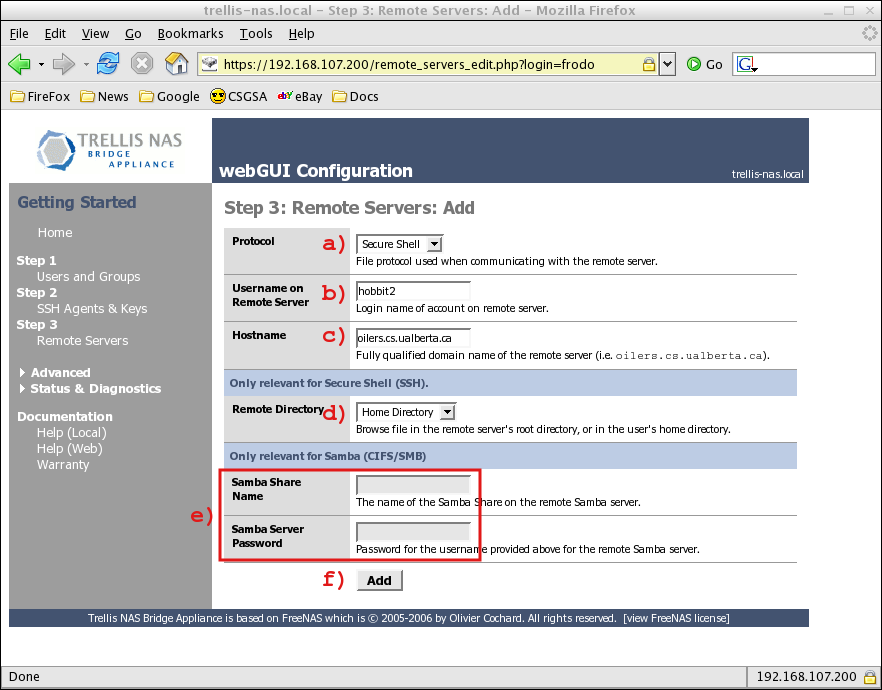
The options under SMB/CIFS (see e) in the screenshot above) are greyed out while SSH is the selected protocol to eliminate confusion.
No password is specified because the SSH agent setup in Step 2 will handle authentication, so all that is required is the username.
Once all fields are filled in, press the Add button (see f) in the screenshot above) and the server will be added to user frodo's list of remote servers. You will first be redirected to a page that will let you either add another remote server or view the list of servers.
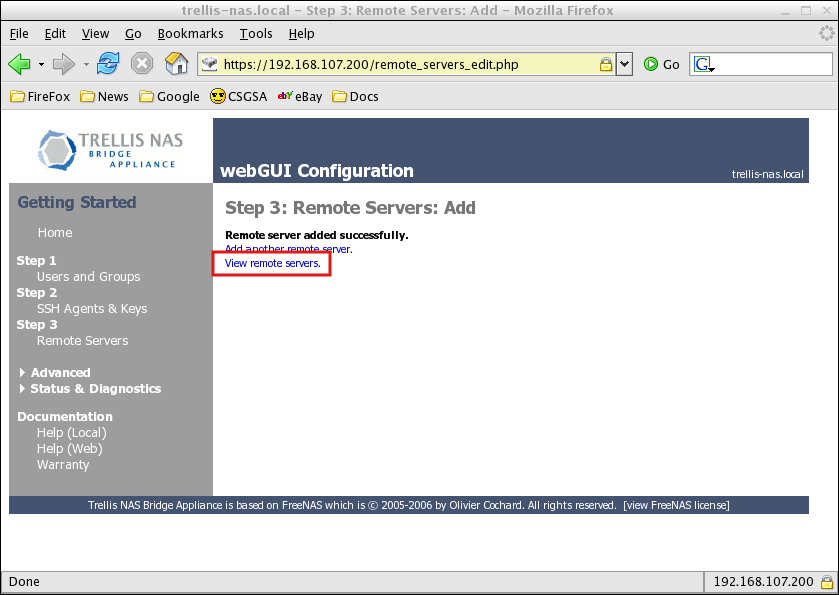
By clicking on View remote servers you will be redirected to the list of servers where the new server will be listed for user frodo
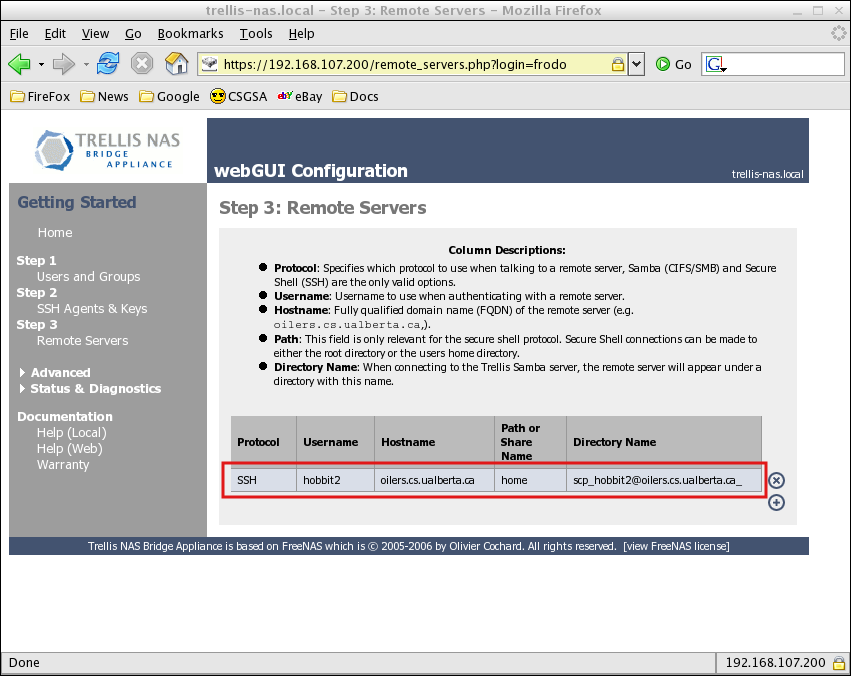
A user will now be able to connect to the appliance as user frodo and under the directory they connect to they will see the directory named scp_hobbit2@oilers.cs.ualberta.ca_. This directory is a bridge to the home account of user hobbit2 on the server oilers.cs.ualberta.ca.
|
|
Using SMB/CIFS to Access Remote Servers
|
It will now be demonstrated how to add a remote server that will use the SMB/CIFS protocol for communication.
As previous, click on the plus sign under the list of remote servers to add another remote server.
This time select Samba from the drop menu of protocols (see a) in the screenshot below). As before, a username and remote hostname must be provided. The difference with the Samba protocol is instead of specifying a home or root directory, a Samba share name (see c) in the screenshot below) and Samba password ( see d) in the screenshot below) are needed. When Samba is selected the Share Name and Password fields are now active and the Remote Directory (see b) in the screenshot below) option is greyed out.
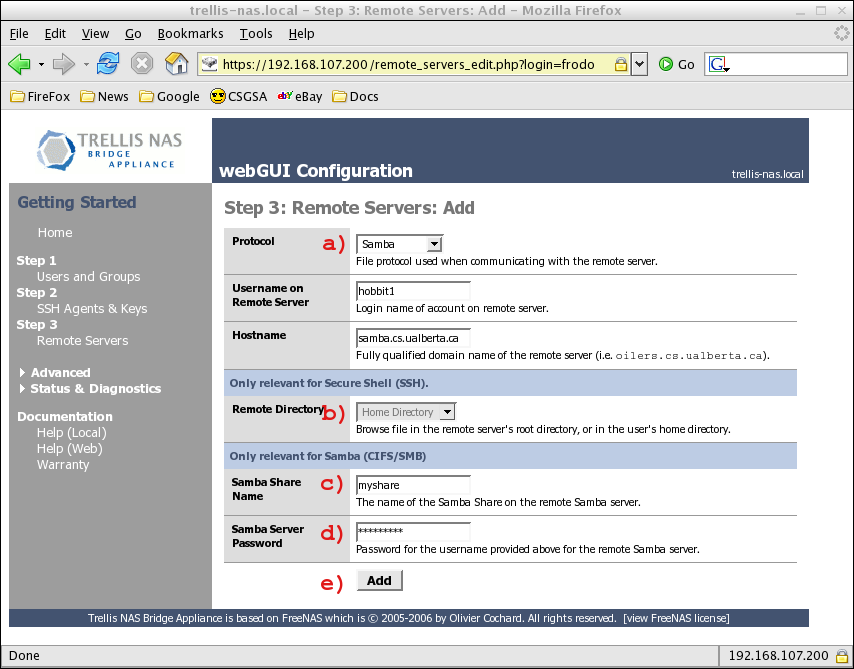
With all the necessary data about your remote Samba server and user specified, click the Add (see e) in the screenshot above) button. You will again be given the choice to add another server or view the list of servers.
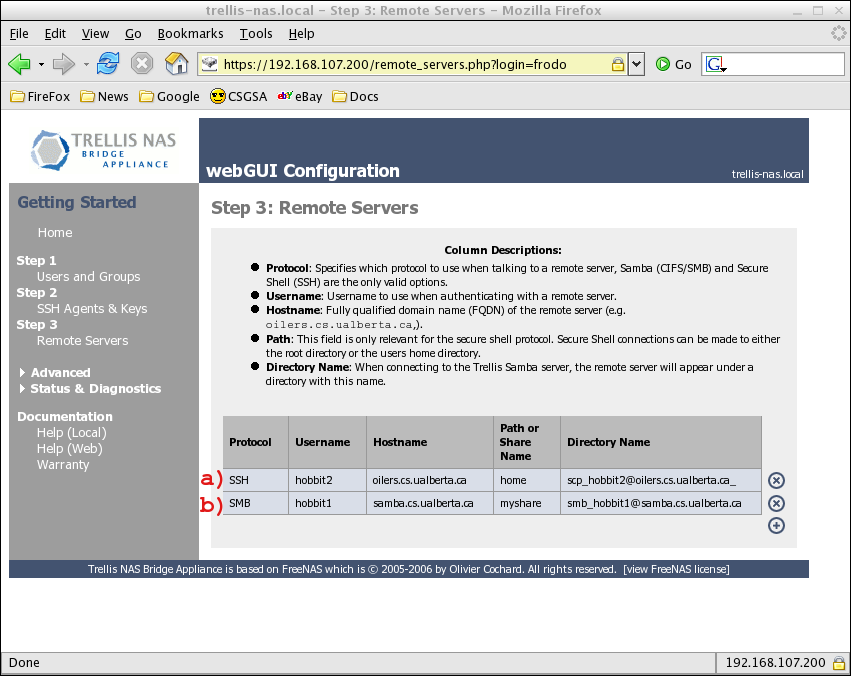
By viewing the list of servers you will see the new remote server that will be accessed using the CIFS/SMB protocol( see b) in the screenshot below).
|
|
Explaining Trellis Remote Directory Names
|
In the screenshot above, the remote directory name for (see a)) is:
scp_hobbit2@oilers.cs.ualberta.ca_
Remote directories that can be accessed by Trellis NBA appear as directories with this sort of name on the appliance share. To explain, the name describes several details about the remote system and how it will be accessed. Directory names adhere to following template:
<protocol>_<remote_user>@<remote_machine><dir>
The following list explains each part of this directory name:
<protocol> is one of two protocols: 'smb' for CIFS/SMB or 'scp' for SSH.
<remote_user> is the username that will be used to access the remote system.
<remote_machine> is the fully-qualified domain name that specifies the remote machine to bridge to.
<dir> the directory to access on the remote machine. An underscore "_" indicates the user's home directory. If there is nothing after the remote machine then two possibilities exist.
- If SSH is the protocol, the root directory (/) will be accessed.
- If CIFS/SMB is the protocol, the SMB share name provided will be accessed.
In the table on the screenshot above, the column labelled Path or Share Name will list the the value of dir that was entered. For SSH remote directories, it will state either home or root. For CIFS/SMB shares, the name of Samba share will be shown.
|
| |