Eclipse Setup Instructions
Table of Contents
1 Installing ANTLR and the ANTLR IDE
You will need to get the Eclipse IDE for Java, you can find it here:
https://www.eclipse.org/downloads/
You want the one that looks like this:

On the right hand side you want to click the operating system that you are on. This will take you to another page, and you should click the big green arrow to actually start the download:

After downloading you should be able to extract the file and run Eclipse from the extracted folder. You must keep the directory that you extract in tact, otherwise Eclipse will break. You can move this directory around, but you must keep it in tact and launch Eclipse from this directory. Try to launch Eclipse now.
If you are using Mac OS X it may complain that it can not open Eclipse because it is from an unidentified developer, you will need to go into your Security & Privacy settings to change this:

Just click on the lock on the bottom left corner to make changes, and it should mention something about Eclipse being blocked. Hit "Open Anyway", and you should be able to launch Eclipse now.
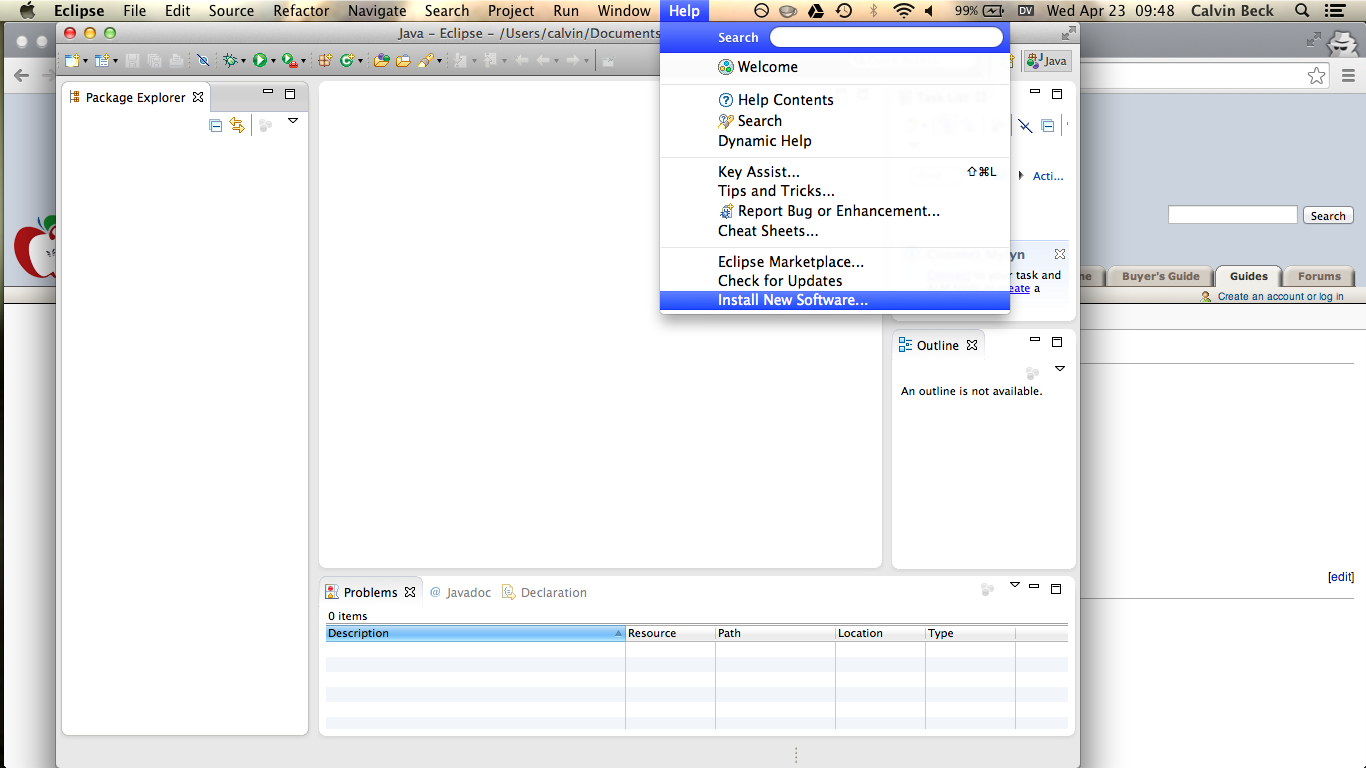
Now once Eclipse is open you need to go to Help -> Install New Software:
Once you click this you should get a window that looks like the following:
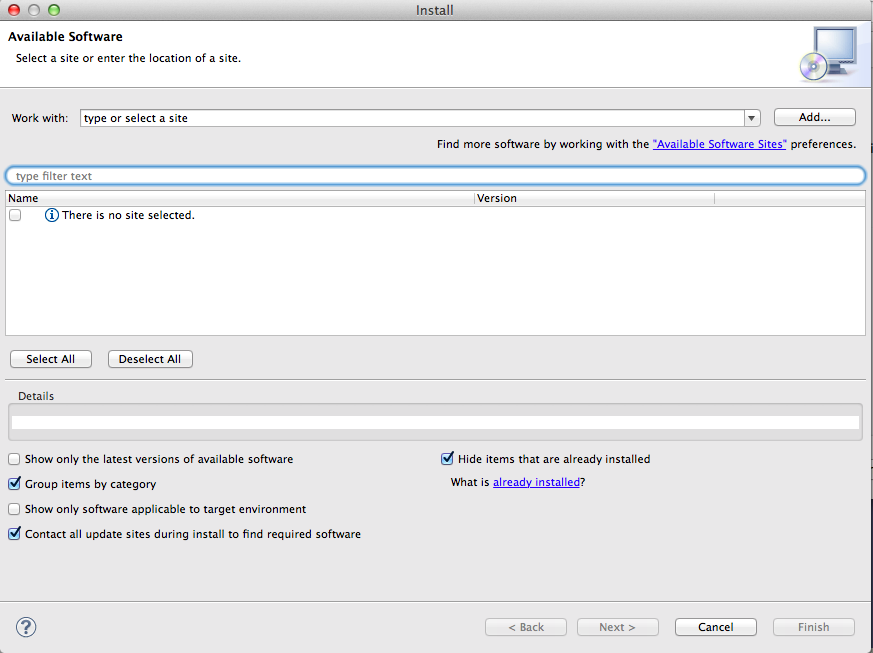
Uncheck show only the latest versions of available software, which is on the left side a little bit below the middle.
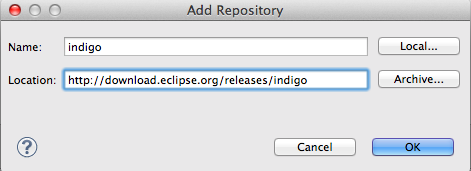
Then click add on the top right, and you should get a pop up. For name put indigo, and for location put http://download.eclipse.org/releases/indigo
It should look something like this:
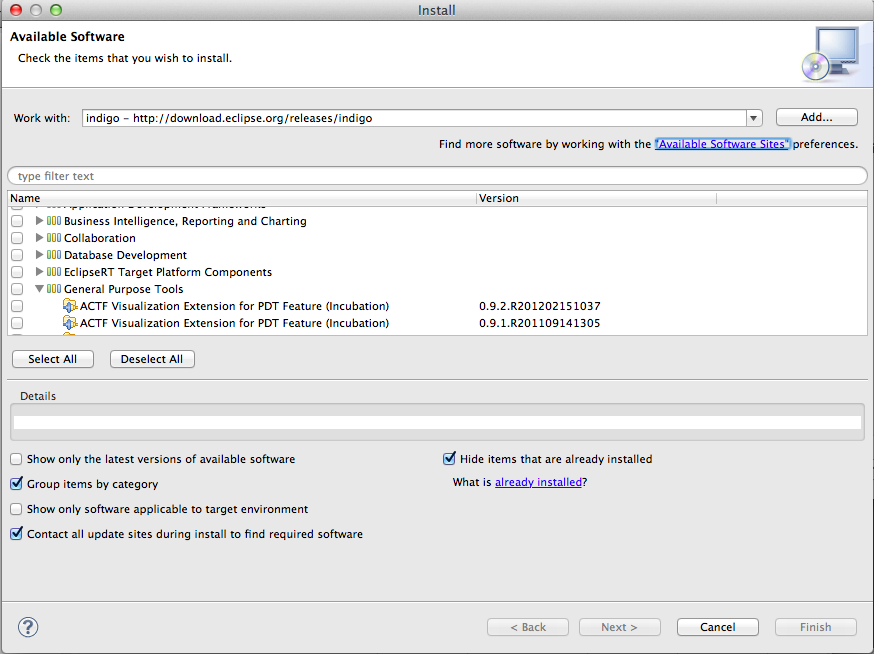
Once you are done this click "OK". After this is done make sure you select "indigo - https://www.eclipse.org/downloads/" for "Work with", you should see some things appear in the middle area. Find "General Purpose Tools" and click the grey right arrow to expand it. You should get something that looks like the following (note the arrow points downwards in this image because we have already expanded the menu).
Then you want to find the "Dynamic Languages Toolkit - Core Frameworks" in the area that you have just expanded. It should look like this (install the top one):
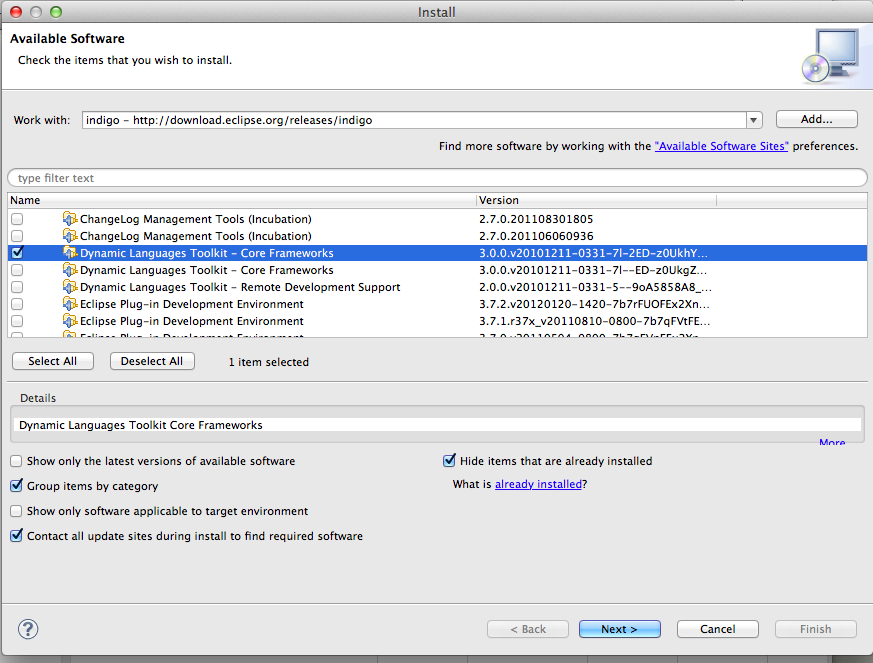
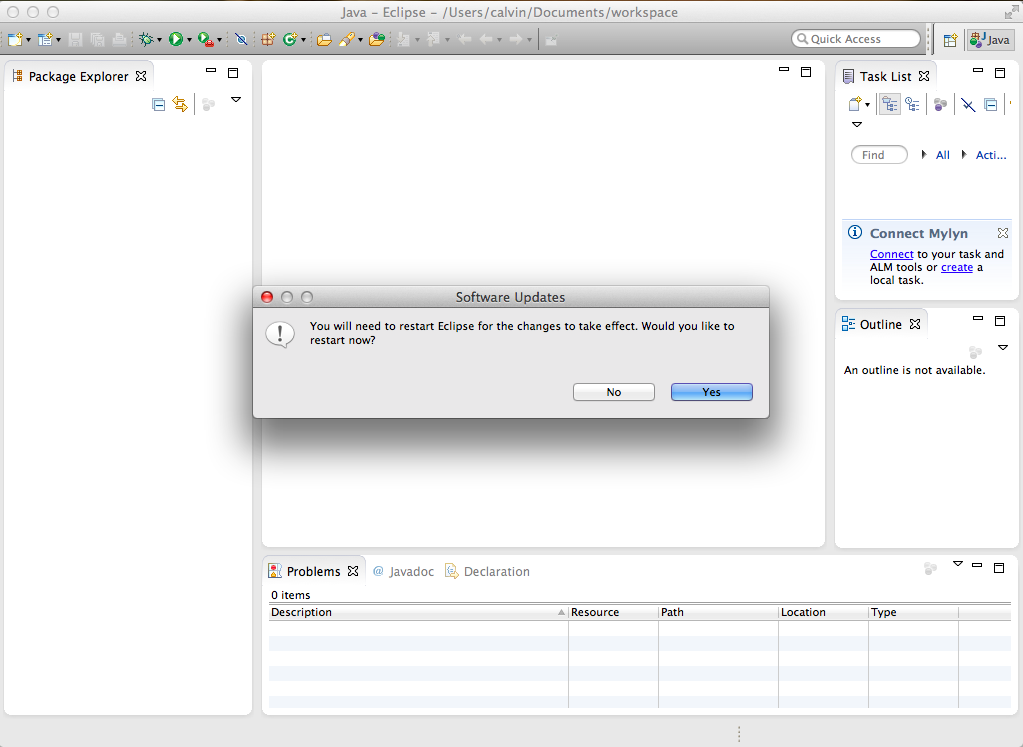
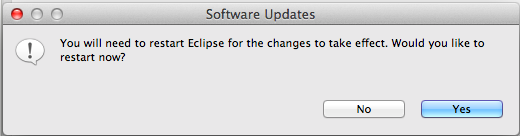
Click the check box on the left as shown above, and then click "Next" at the bottom. Click next again, agree to the license, and then finish the install. When it is done Eclipse should ask you to restart.
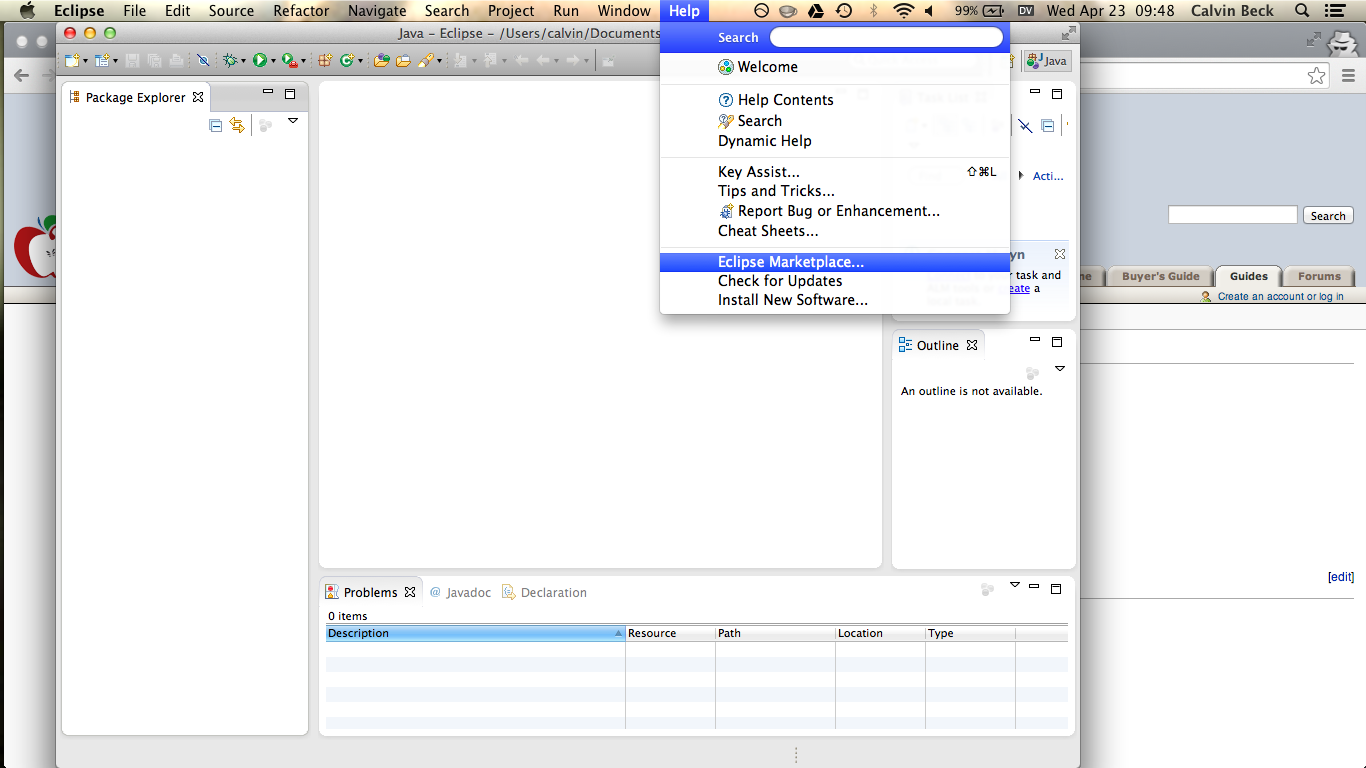
Once Eclipse restarts you want to go to Help -> Eclipse Marketplace.
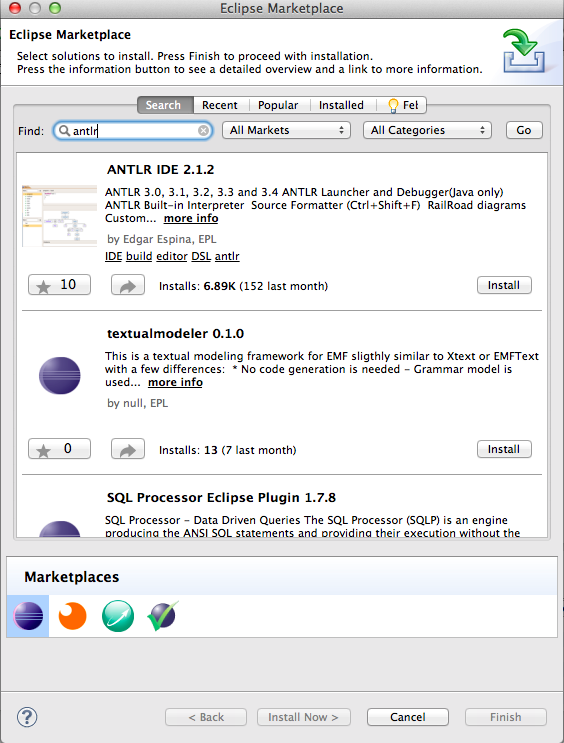
This will take a little while to start up. Once it is finished search for "antlr", and then hit go:
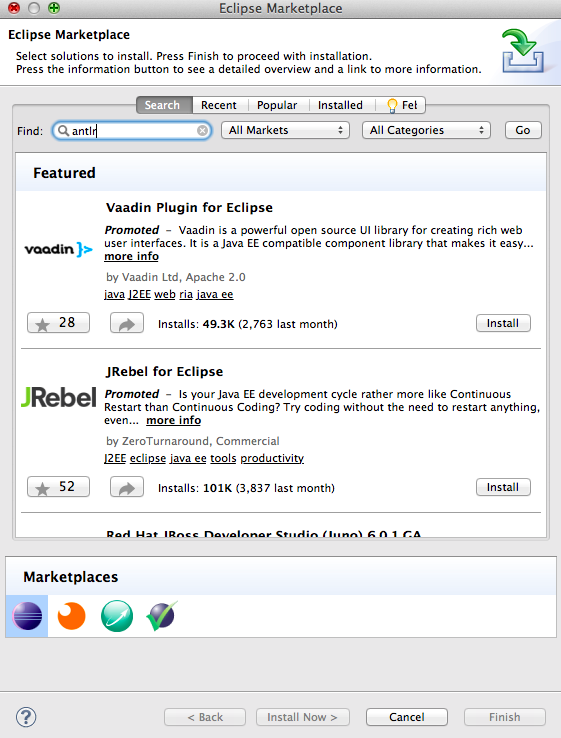
We need to install the one at the top.
Install everything (leave everything checked), and hit confirm.

It will take a little while, but eventually it will ask you to accept a license before it can finish installing. Accept the license agreement, and then click finish and wait for it to finish installing.
You will get a warning that looks like the following:
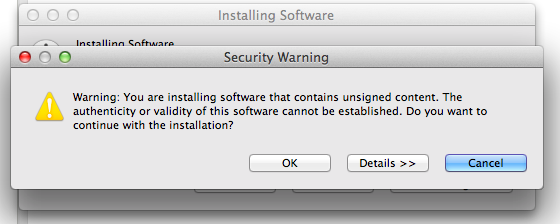
You must click "OK". After this finishes installing Eclipse will ask to restart again, click "yes":
Now you need to download the ANTLR 3.3 jar from here: https://github.com/antlr/website-antlr3/raw/gh-pages/download/antlr-3.3-complete.jar
Note that you must use this version of ANTLR. After you download this jar you should put it in a directory that you can find easily (I just put the jar in my eclipse directory).
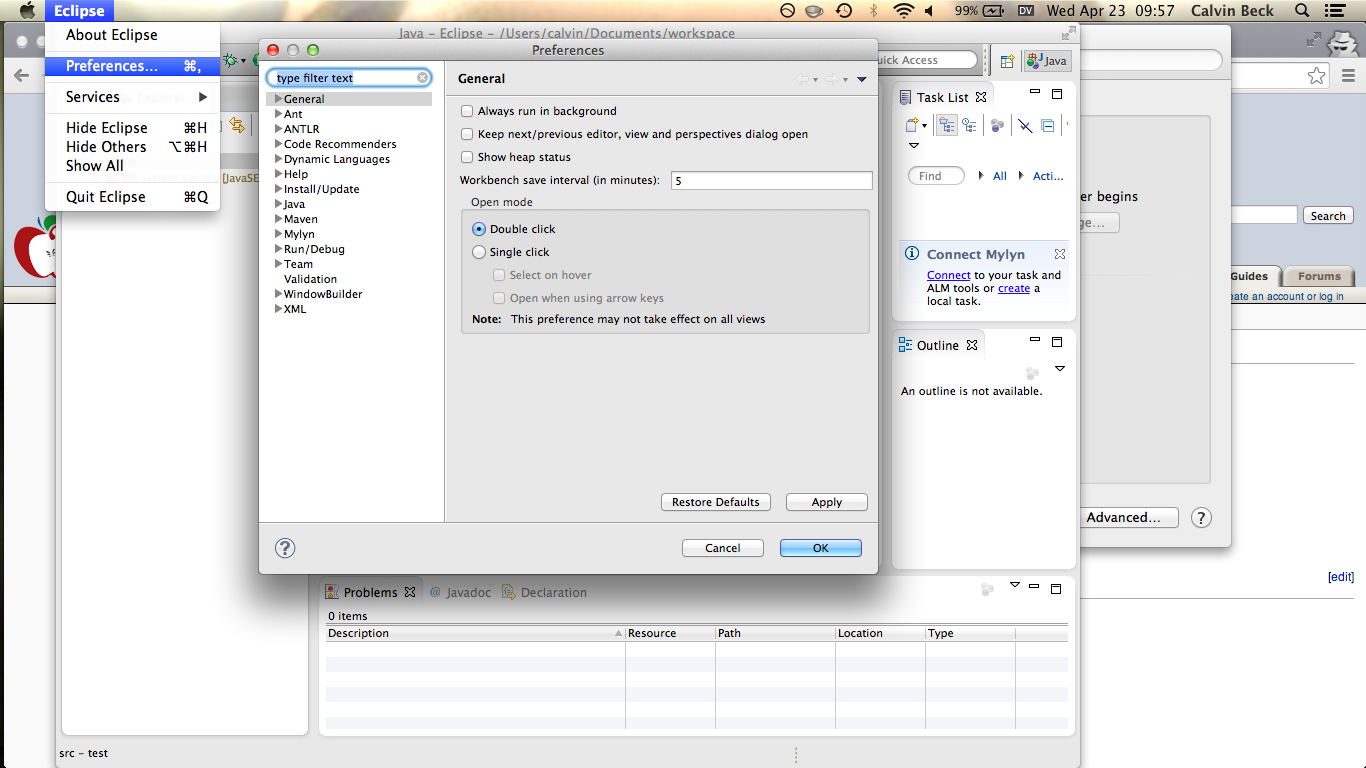
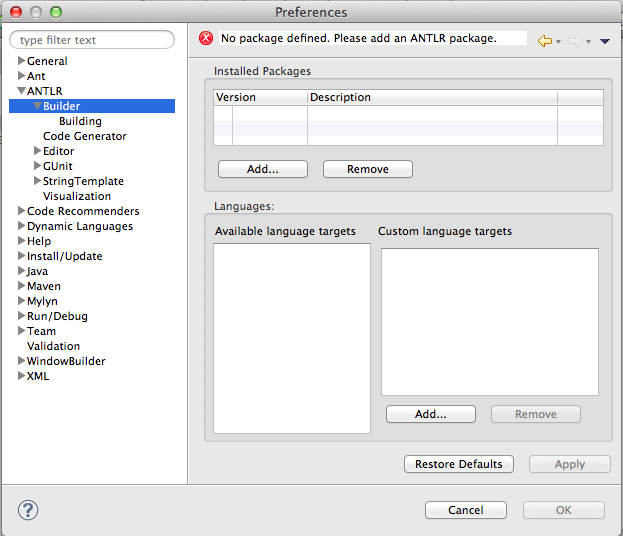
At this point you will have to go back to Eclipse, and go to Eclipse -> Preferences
Click on the grey right arrow next to ANTLR and then when that expands click on "Builder" (not the arrow to the left of it):
From there click on the top "Add…" button (underneath "Installed Packages"). You should get something like this:

Click directory and navigate to the directory that you put the jar file in. Mine was placed in the eclipse folder (which was at /Applications/eclipse):
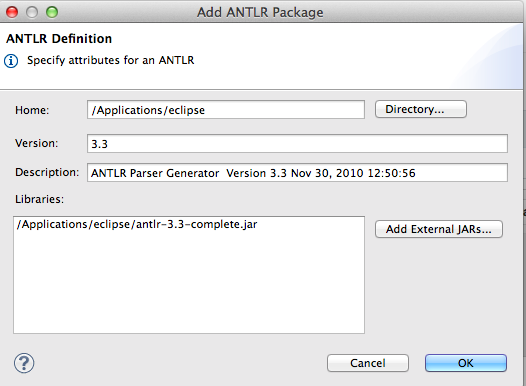
Once your screen looks something like this click "OK". Now your main preferences window should look like this:

Press "OK" at the bottom right, and now everything should be set up.
2 Setting up a Project
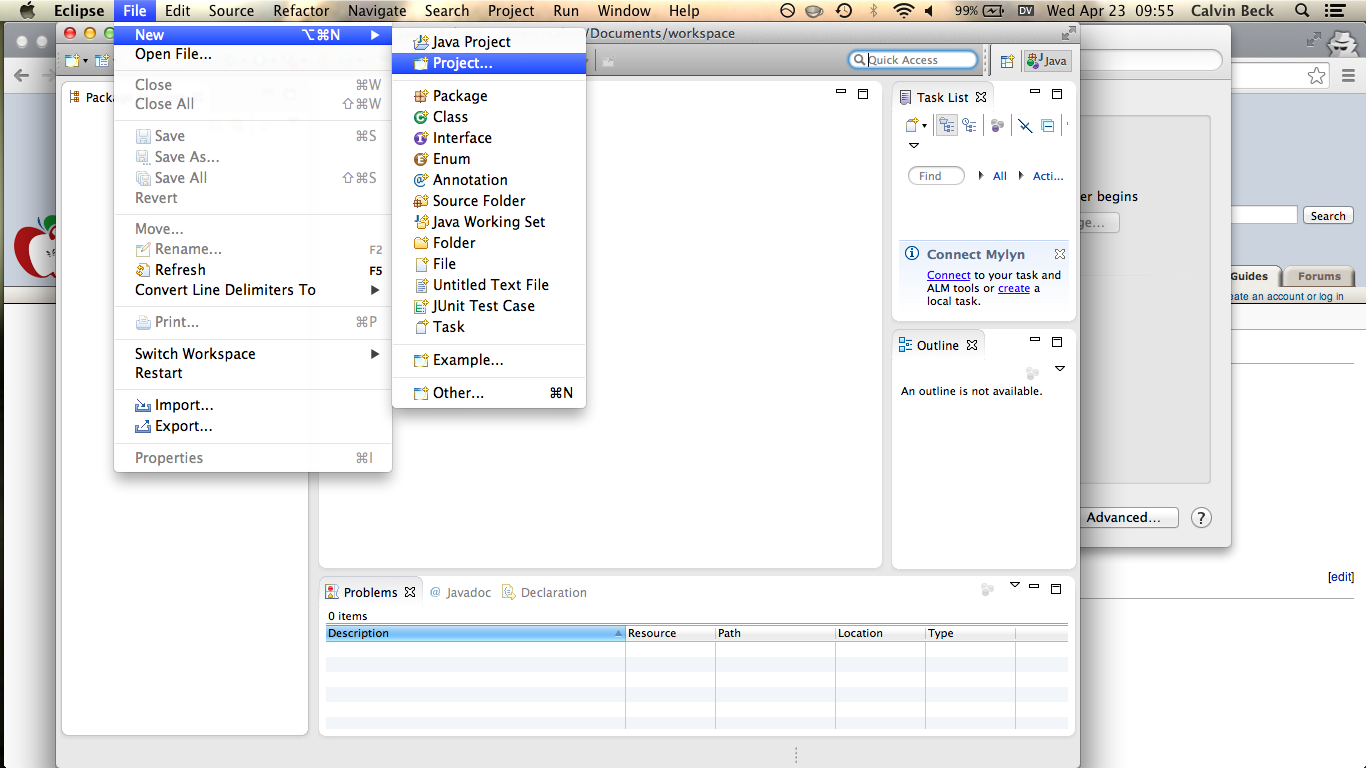
Once you have Eclipse set up you can create a project. Go to File -> New -> Project…
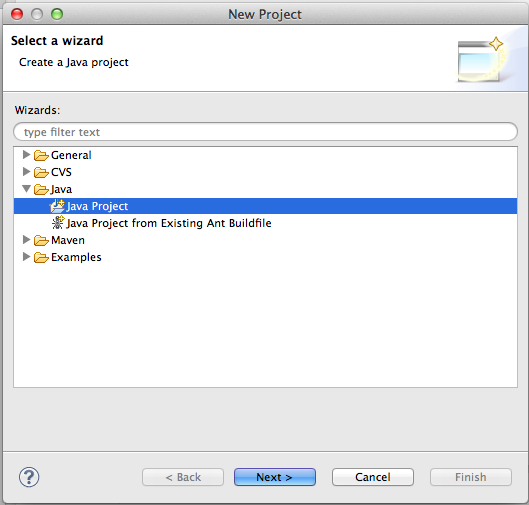
Then make a Java project:
Click "Next".
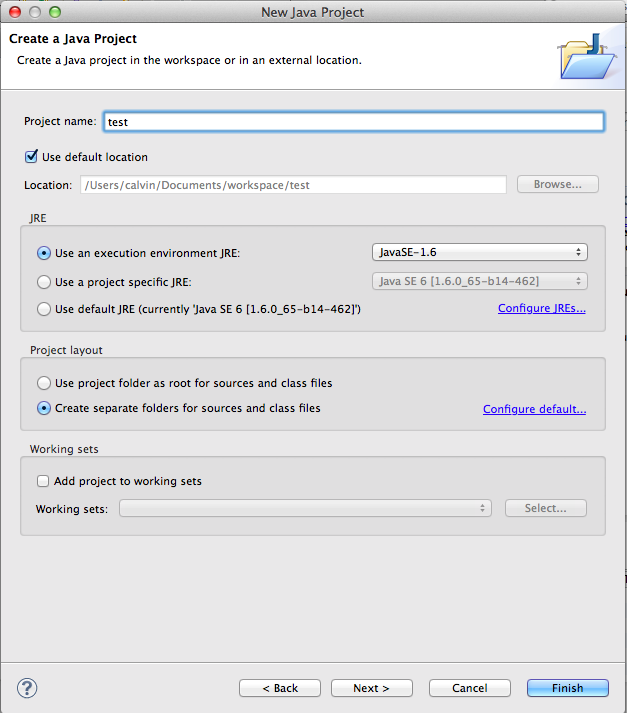
Pick a name for your project (I called mine "test" here).
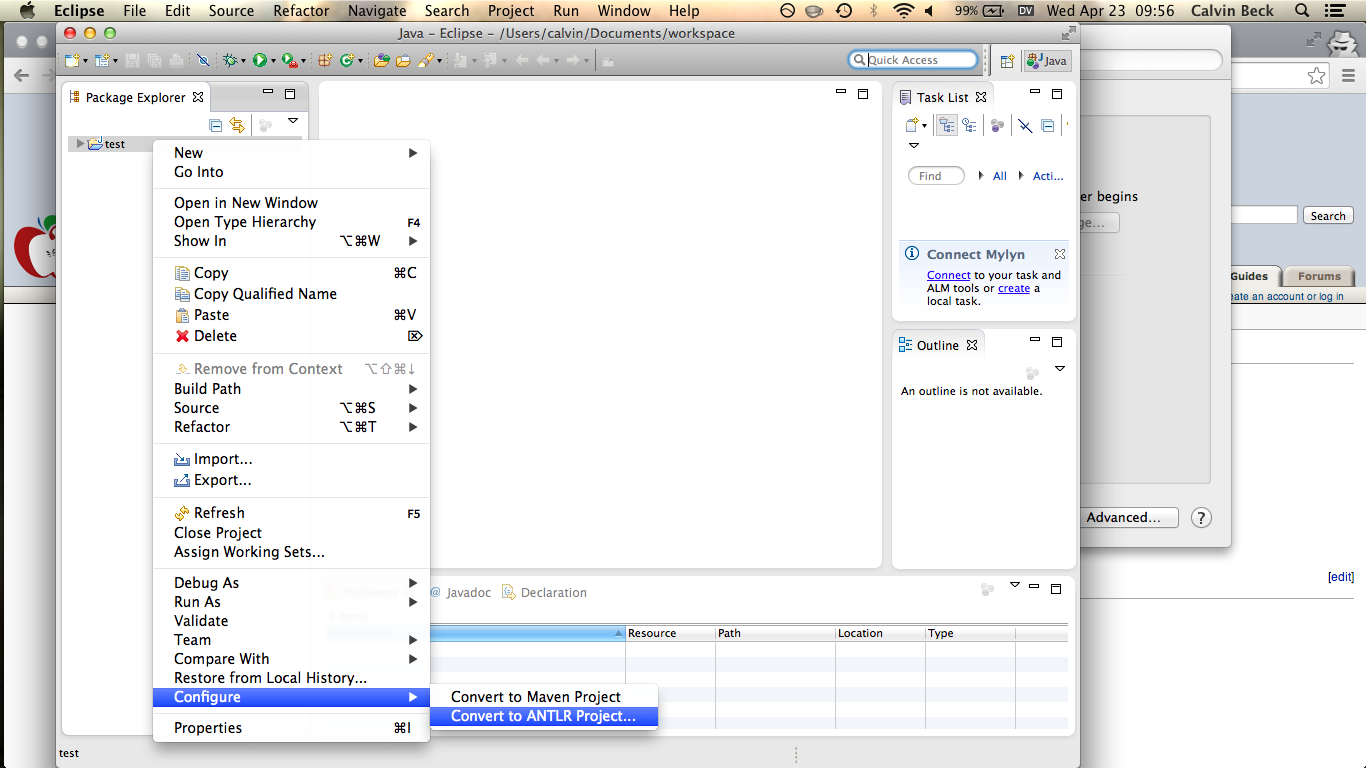
Then you must right click on your project in the "Package Explorer", go to "Configure", and then click "Convert to ANTLR Project…"
And now you should be all set!